Using Serverless Framework
This tutorial implements a serverless application and deploy it to AWS Lambda using Serverless Framework
note
See Using AWS SAM, if you prefer AWS SAM over Serverless Framework.
Step 1: Create database on Upstash#
If you do not have one, create a database following this guide.
Step 2: Project Setup#
If you do not have it already install serverless framework via: npm install -g serverless
In any folder run serverless as below:
>> serverless
Serverless: No project detected. Do you want to create a new one? YesServerless: What do you want to make? AWS Node.jsServerless: What do you want to call this project? test-upstash
Project successfully created in 'test-upstash' folder.
You can monitor, troubleshoot, and test your new service with a free Serverless account.
Serverless: Would you like to enable this? NoYou can run the “serverless” command again if you change your mind later.
Inside the project folder create a node project with the command:
npm initThen install the redis client with:
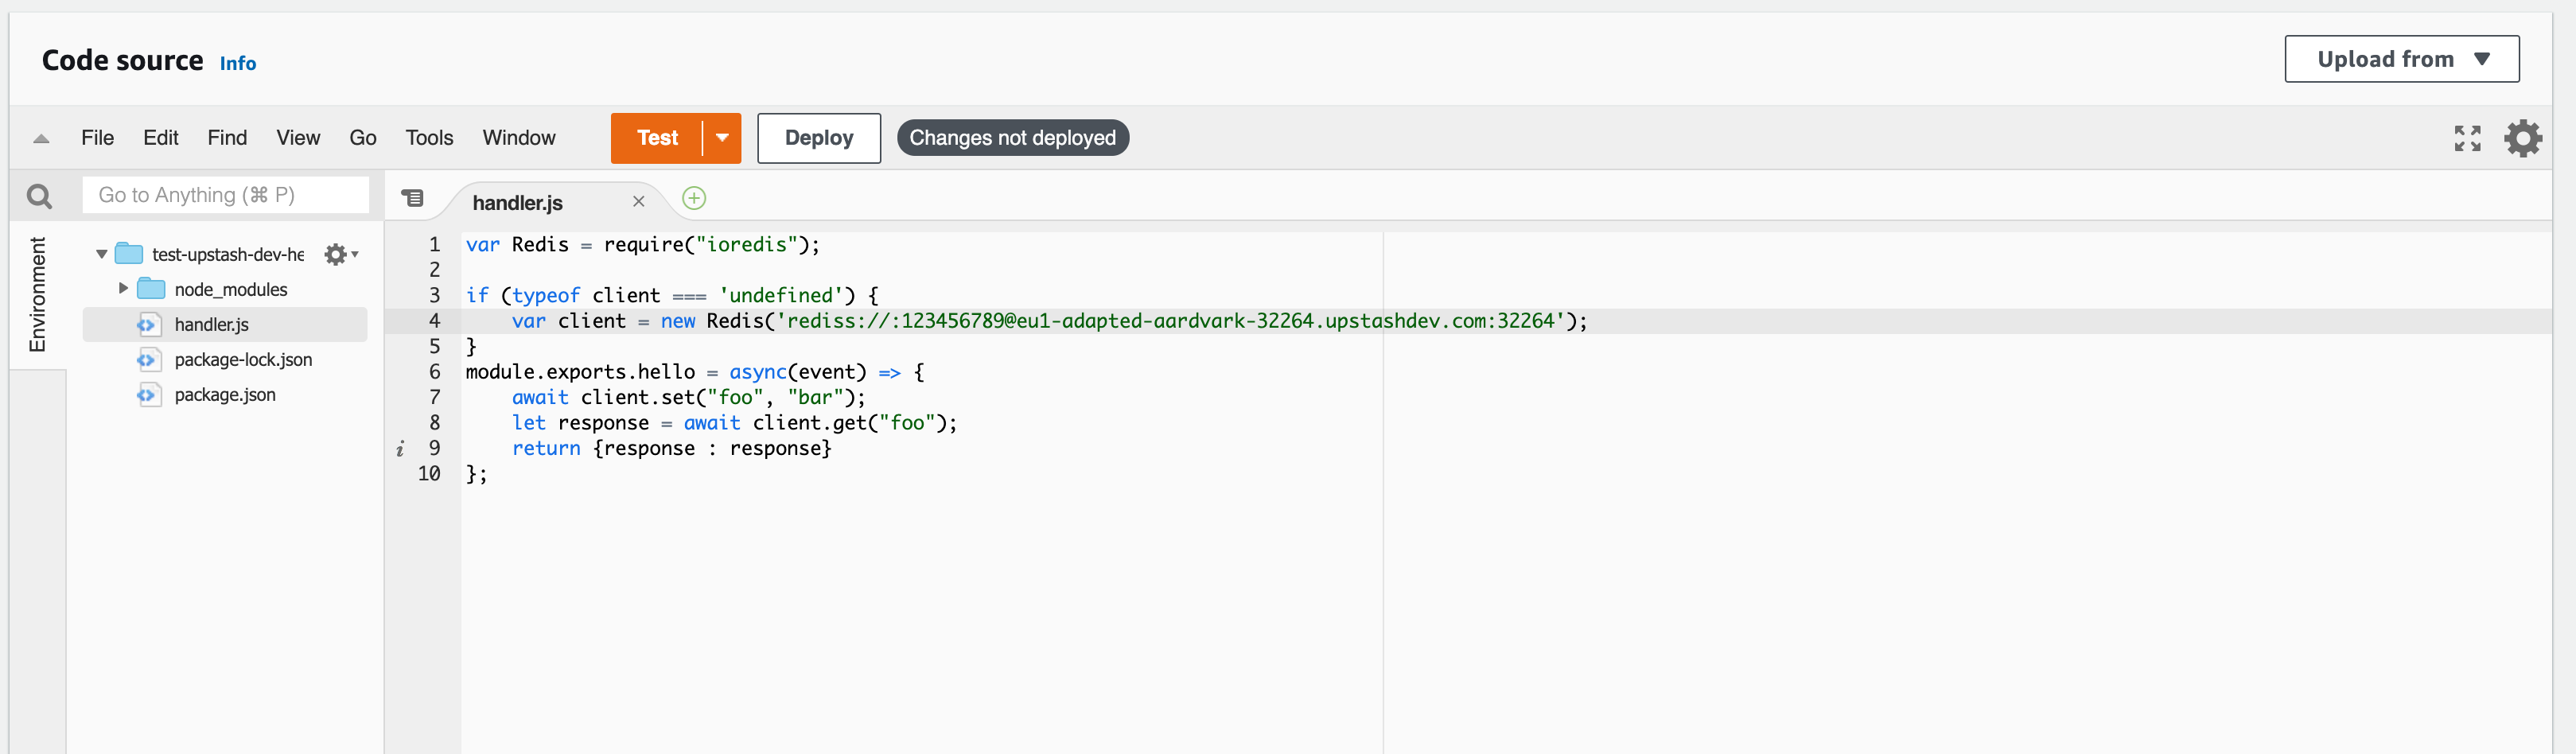
npm install ioredisEdit handler.js file as below. Replace the Redis URL (copy ioredis url from your Upstash console).
var Redis = require("ioredis");
if (typeof client === 'undefined') { var client = new Redis(REDIS_URL);}module.exports.hello = async(event) => { await client.set("foo", "bar"); let response = await client.get("foo"); return {response : response}};Step 3: Deploy Your Function#
In the project folder run:
serverless deployThe output will be:
➜ test-upstash> serverless deployServerless: Packaging service...Serverless: Excluding development dependencies...Serverless: Creating Stack...Serverless: Checking Stack create progress...........Serverless: Stack create finished...Serverless: Uploading CloudFormation file to S3...Serverless: Uploading artifacts...Serverless: Uploading service test-upstash.zip file to S3 (178.2 KB)...Serverless: Validating template...Serverless: Updating Stack...Serverless: Checking Stack update progress..................Serverless: Stack update finished...Service Informationservice: test-upstashstage: devregion: us-east-1stack: test-upstash-devresources: 6api keys: Noneendpoints: Nonefunctions: hello: test-upstash-dev-hellolayers: None
Run your function via serverless invoke -f hello:
➜ test-upstash> serverless invoke -f hello{ "response": "bar"}You can also test your function using AWS console. In your AWS Lambda section, click on your function. Scroll down to the code sections and click on the Test button on the top right.
Congratulations, now your lambda function inserts entry to your Upstash database.
What can be the next?#
- You can write and deploy another function to just get values from the database.
- You can integrate API Gateway so you can call your function via http.
- You can learn about how to monitor your functions from CloudWatch as described here.
Redis Connections in AWS Lambda#
Although Redis connections are very lightweight, a new connection inside each Lambda function can cause a notable latency. On the other hand, reusing Redis connections inside the AWS Lambda functions has its own drawbacks. When AWS scales out Lambda functions, the number of open connections can rapidly increase. Fortunately, Upstash detects and terminates the idle and zombie connections thanks to its smart connection handling algorithm. Thanks to this algorithm; we have been recommending caching your Redis connection in serverless functions.
info
See the blog post about the database connections in serverless functions.